Intercom Event Streaming
Amplitude CDP's Intercom streaming integration enables you to forward your Amplitude events and users straight to Intercom with just a few clicks.
Other Amplitude CDP + Intercom integrations
This integration streams Amplitude events and users to Intercom. Amplitude CDP offers other integrations with Intercom:
Setup
Prerequisites
Create a new Intercom app
- From the Intercom Developer Hub, click on Your Apps.
- Click New App.
- Enter a name and select a workspace.
- Click Create App.
See Intercom's documentation for more detailed instructions on creating an app.
Required information
To configure streaming from Amplitude to Intercom, you need the following information from Intercom.
Intercom Access Token: The Intercom Access Token for your Intercom app.
- From the Intercom Developer Hub, click on Your Apps.
- Click on your app.
- Navigate to the Authentication page.
- The Intercom Access Token is listed immediately below the workspace name under Access Token.
Create a new sync
- In Amplitude Data, click Catalog and select the Destinations tab.
- In the Event Streaming section, click Intercom.
- Enter a sync name, then click Create Sync.
Enter credentials
- Select your Intercom API Endpoint.
- Enter your Intercom Access Token.
Configure mappings
This applies to both event and user forwarding. Transformed user properties aren't supported.
- Select an Amplitude user property that corresponds to your Intercom user ID, from the left dropdown.
- Select the type of your Intercom user ID, from the right dropdown.
- User ID: Any unique identifier for each user in Intercom.
Configure event forwarding
Under Send Events, make sure the toggle is enabled ("Events are sent to Intercom") if you want to stream events to Intercom. When enabled, events are automatically forwarded to Intercom when they're ingested in Amplitude. Events aren't sent on a schedule or on-demand using this integration. Events are sent to Intercom as Intercom data events. Intercom has a limit of 120 event types.
Intercom triggers an event [Intercom] event.created when Intercom creates events, including events from Amplitude's Event Streaming integration.
If you don't want Amplitude to store these events, use Amplitude's block or drop filters to remove this data.
-
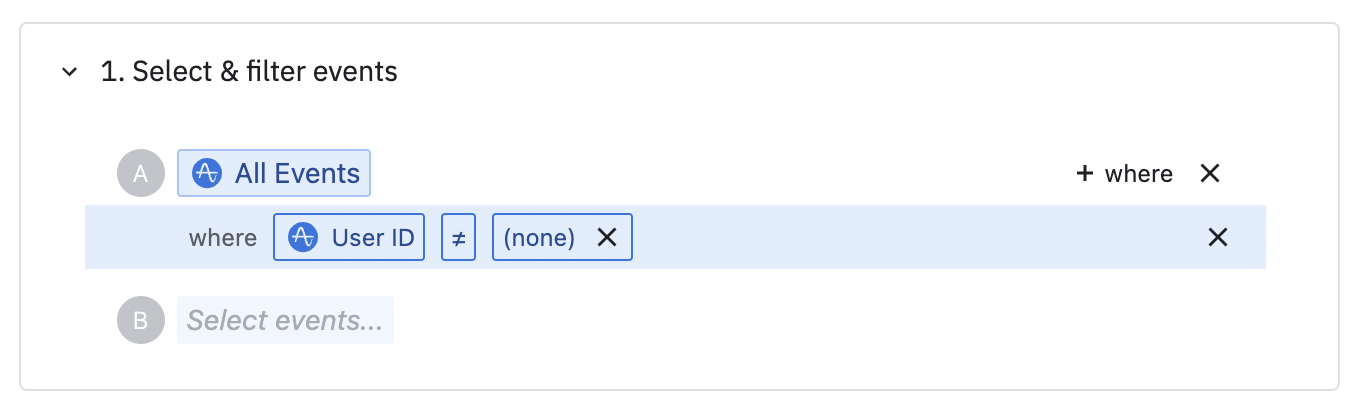
In Select and filter events choose which events you want to send. Choose only the events you need in Intercom. Transformed events aren't supported.
Events for anonymous users cannot be streamed
Intercom requires that all events have a user ID present. If you have selected any events to send to Intercom that may not have a user ID, add a filter to send only events where the user ID is present. Additionally, events can only be streamed for users that already exist in Intercom. Otherwise, your delivery metrics may be affected.
-
(optional) In Select additional properties, select any more event and user properties you want to send to Intercom. If you don't select any properties here, Amplitude doesn't send any. These properties are sent to Intercom as Intercom event metadata. Intercom has a limit of 20 metadata values per event. Transformed event properties and transformed user properties aren't supported.
Configure user forwarding
To stream user and property updates to Intercom, enable Send Users. This setting creates or updates users in Intercom when you update them in Amplitude with the HTTP V2 API or Identify API. This integration doesn't support scheduled or on-demand updates. Each user is created as an Intercom contact.
You can optionally select user properties to send to Intercom in the Select additional properties field. Amplitude sends only the properties you select and only when one of them is updated. Amplitude sends these properties as Intercom custom attributes. This integration doesn't support transformed user properties.
Enable sync
When satisfied with your configuration, at the top of the page toggle the Status to "Enabled" and click Save.