Send Amplitude Event Data to Google Cloud Storage
Amplitude users can now export Amplitude event data and merged user data to their Google Cloud Storage (GCS) account. Google Cloud's bucket policies allow you to manage and programmatically export this data into a Google Cloud bucket. Using the Amplitude UI, you can set up recurring syncs as often as once per hour.
Feature availability
This feature is available in all accounts, including accounts with free plans.
Other Amplitude + Google Cloud Storage Integrations
This integration sends Amplitude data to GCS. Amplitude offers other integrations with Google Cloud Storage:
Create a GCS service account and set permissions
If you haven't already, create a service account for Amplitude within the Google Cloud console. This allows Amplitude to export your data to your Google Cloud project.
After you create a service account, generate and download the service account key file and upload it to Amplitude. Make sure you export Amplitude's account key in JSON format.
Add this service account as a member to the bucket you'd like to export data to. Give this member the storage admin role to make sure Amplitude has the necessary permissions to export the data to your bucket.
You can also create your own role, if you prefer.
Keep in mind that the export process requires, at a minimum, the following permissions:
storage.buckets.getstorage.objects.getstorage.objects.createstorage.objects.deletestorage.objects.list
Set up a recurring data export to GCS
To set up a recurring export of your Amplitude data to GCS, follow these steps:
Note
You need admin privileges in Amplitude, as well as a role that allows you to enable resources in GCS.
- In Amplitude Data, click Catalog and select the Destinations tab.
- In the Warehouse Destination section, click Google Cloud Storage.
-
On the Getting Started tab, select the data you'd like to export. You can Export events ingested today and moving forward, Export all merged Amplitude IDs, or both. For events, you can also specify filtering conditions to only export events that meet certain criteria.
Note
You can export these two different data types to separate buckets, if you prefer. You'll just need to complete the setup flow twice: once for each data type.
-
Review the Event table and Merge IDs table schemas and click Next.
- In the Google Cloud Credentials For Amplitude section, upload the Service Account Key file. This file must be in JSON format.
- After the account service key is uploaded, fill out the Google Cloud bucket details in the Google Cloud Bucket Details section.
- Click Next. Amplitude attempts a test upload to check that the entered credentials work. If the upload is successful, click Finish to complete the GCS destination configuration and activation.
All future events/merged users are automatically sent to GCS. Amplitude exports files to your GCS account every hour.
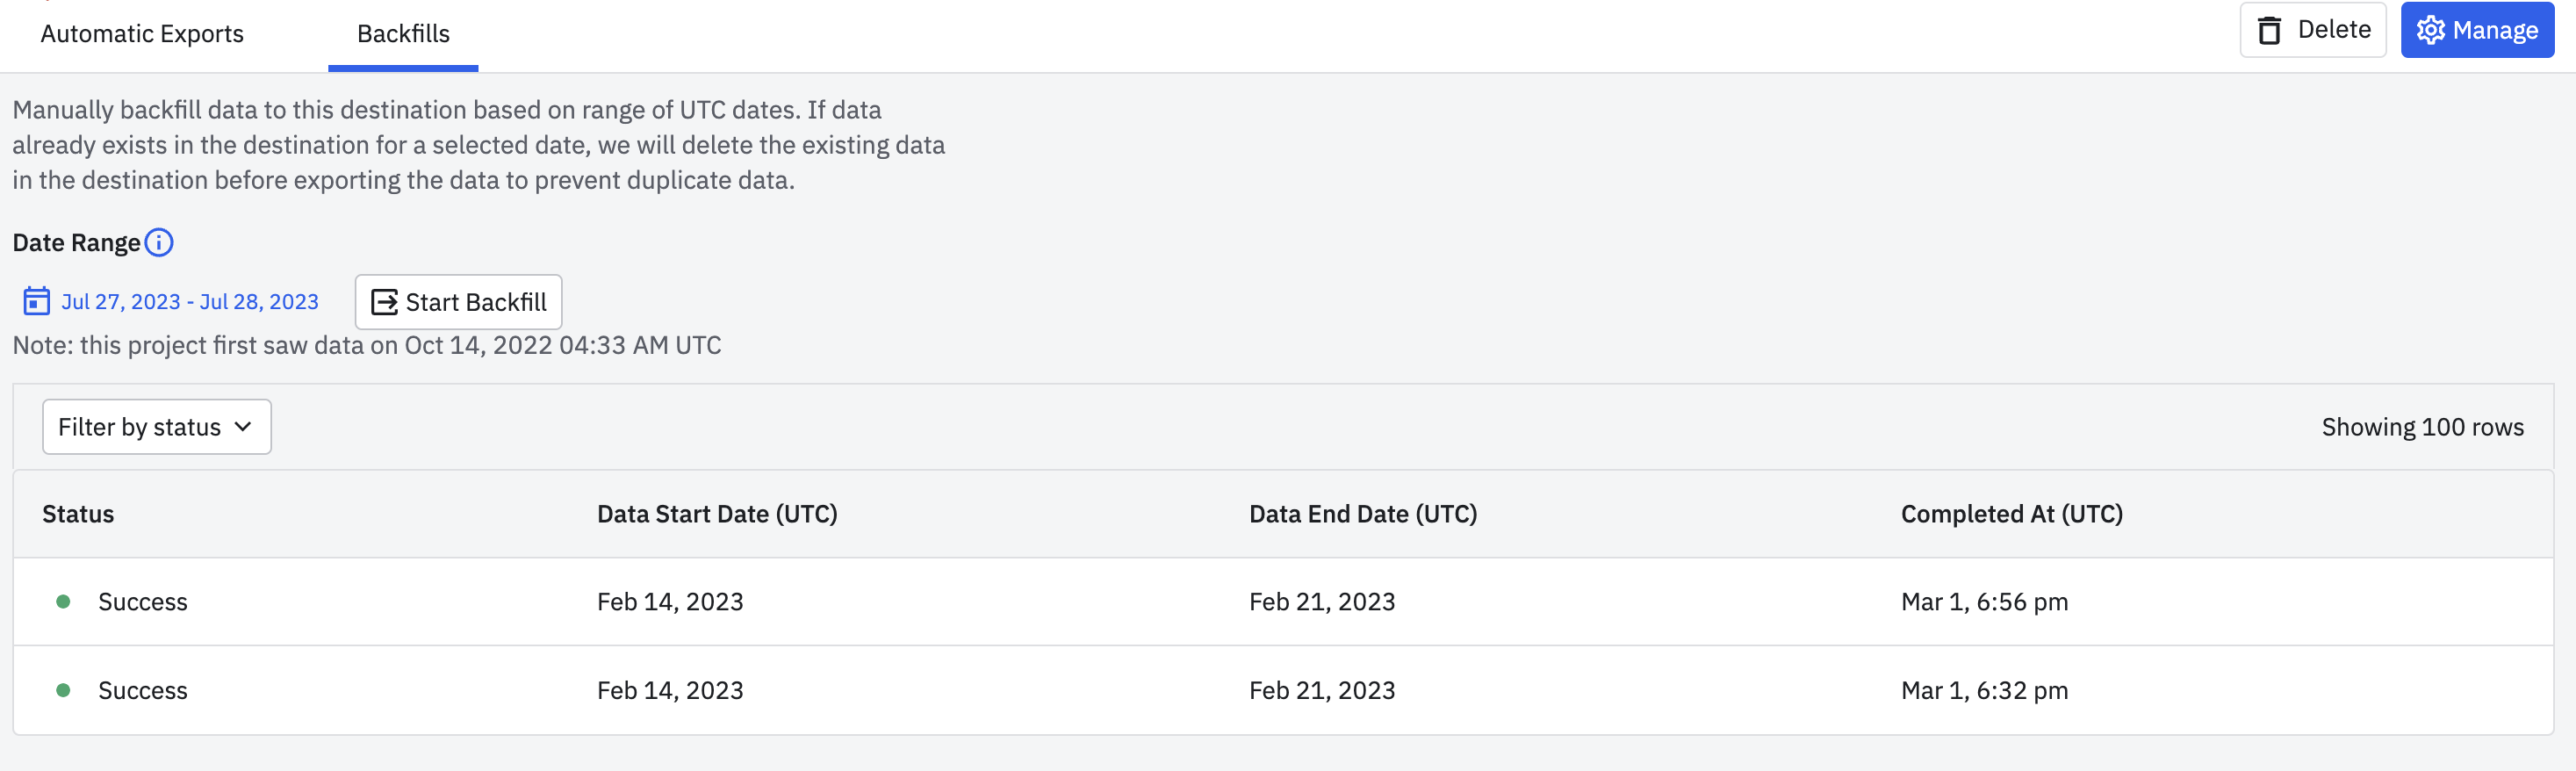
Run a manual export
You can backfill historical data to GCS by manually exporting data.
- Go to the Google Cloud Storage export connection page created in the section above.
- Go to Backfills tab.
- Select the desired date range.
- Click Start Backfill.
If the backfill range overlaps with the range of previously exported data, Amplitude will de-duplicate overlapping data.
Exported data format
Raw event file and data format
Data is exported hourly as zipped archive JSON files, and partitioned by the hour with one or multiple files per hour. Each file contains one event JSON object per line.
File names have the following syntax, where the time represents when the data was uploaded to Amplitude servers in UTC (for example, server_upload_time):
projectID_yyyy-MM-dd_H#partitionInteger.json.gz
For example, the first partition of data uploaded to this project, on Jan 25, 2020, between 5 PM and 6 PM UTC, is in the file:
187520_2020-01-25_17#1.json.gz
Here is the exported data JSON object schema:
{
  "server_received_time": UTC ISO-8601 timestamp,
  "app": int,
  "device_carrier": string,
  "$schema":int,
  "city": string,
  "user_id": string,
  "uuid": UUID,
  "event_time": UTC ISO-8601 timestamp,
  "platform": string,
  "os_version": string,
  "amplitude_id": long,
  "processed_time": UTC ISO-8601 timestamp,
  "user_creation_time": UTC ISO-8601 timestamp,
  "version_name": string,
  "ip_address": string,
  "paying": boolean,
  "dma": string,
  "group_properties": dict,
  "user_properties": dict,
  "client_upload_time": UTC ISO-8601 timestamp,
  "$insert_id": string,
  "event_type": string,
  "library":string,
  "amplitude_attribution_ids": string,
  "device_type": string,
  "device_manufacturer": string,
  "start_version": string,
  "location_lng": float,
  "server_upload_time": UTC ISO-8601 timestamp,
  "event_id": int,
  "location_lat": float,
  "os_name": string,
  "amplitude_event_type": string,
  "device_brand": string,
  "groups": dict,
  "event_properties": dict,
  "data": dict,
  "device_id": string,
  "language": string,
  "device_model": string,
  "country": string,
  "region": string,
  "is_attribution_event": bool,
  "adid": string,
  "session_id": long,
  "device_family": string,
  "sample_rate": null,
  "idfa": string,
  "client_event_time": UTC ISO-8601 timestamp,
 }
Merged Amplitude IDs file and data format
Data is exported hourly as zipped archive JSON files. Each file contains one merged Amplitude ID JSON object per line.
File names have the following syntax, where the time represents when the data was uploaded to Amplitude servers in UTC (for example server_upload_time):
-OrgID_yyyy-MM-dd_H.json.gz
For example, data uploaded to this project, on Jan 25, 2020, between 5 PM and 6 PM UTC, is in the file:
-189524_2020-01-25_17.json.gz
Merged ID JSON objects have the following schema:
{
 "scope": int,
 "merge_time": long,
 "merge_server_time": long,
 "amplitude_id": long,
 "merged_amplitude_id": long
}